September 16, 2026 Post by : Editorial Craft & Home
The Case for a Small Garden: Why Less Space Can Mean More Joy
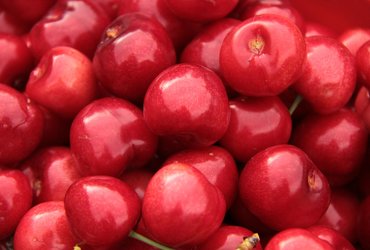
If you've ever made a cherry pie from scratch, you know the pile of pits that accumulates on the counter. Most of us toss them without a second thought. But those little stones are actually one of the best natural materials for a DIY heating pad — they hold warmth for a surprisingly long time, they mold gently to your shoulders or lower back, and if you've saved them from fresh cherries, they carry a faint, sweet scent that only gets better with use.
I made my first cherry pit pad two summers ago after a particularly ambitious batch of cherry jam left me with a bowlful of pits and a vague memory of my grandmother doing something similar. Now I make one every year, and they've become my favorite handmade gift for friends who run cold in winter.
What You'll Need
The supplies are simple and inexpensive. You'll need about two to three cups of clean, thoroughly dried cherry pits. If you're starting from fresh cherries, rinse the pits well, spread them on a baking sheet, and let them dry in a warm, airy spot for several days — or speed things up in a low oven (around 200°F) for an hour or two, stirring occasionally. Make absolutely sure they're bone dry before sewing them in, or you'll end up with mildew.
For the fabric, choose something sturdy and natural: cotton canvas, linen, or a thick flannel all work beautifully. You'll want a rectangle roughly 5 by 12 inches for a neck-and-shoulders pad, or a smaller square for a pocket warmer. A funnel helps with filling, and a sewing machine (or a patient hand-sewing session) does the rest.
Sew three sides of your fabric rectangle, right sides together, leaving one short end open. Turn it right side out. Fill it about two-thirds full with the dried pits — you want it flexible, not brick-like. Then sew the open end closed, either with a machine or a neat slip stitch by hand. If you're worried about the pits shifting, you can sew a few vertical lines down the pad to create channels.
How to Use and Care for It
To warm your pad, microwave it in 30-second increments until it reaches the temperature you like, usually one to two minutes total. Always test it against your wrist before putting it on your skin, and never leave it unattended while heating. You can also chill the pad in the freezer for a few hours to use as a cold compress on hot summer afternoons — a nice trick during cherry season itself.
To keep it fresh, spot clean with a damp cloth and let it air dry completely. Don't submerge it in water, since the pits inside will never dry properly. Stored in a dry cupboard, a cherry pit pad will last for years, softening slightly with each use.
There's something quietly satisfying about turning a byproduct of summer baking into a small comfort for January evenings. It's the kind of project that reminds you that the season you're missing will come around again — and that a little warmth, made by your own hands, is often enough to get you through.


Author

22 feb,2025
This incident opened my eyes to the value of Insurance in general, so I decided to examine my personal and business insurance.



Comment (3)
The payments are made directly from one person to another without passing through a central bank or clearing house.
22 feb,2025
ReplyFrom Blossom to Bowl: A Seasonal Guide to Cooking with Fresh Cherries
23 feb,2025
ReplyPlanting a Cherry Tree: What I Wish I'd Known Before I Dug the Hole
23 feb,2025
Reply